Secrets & Oddities
Warps/Shortcuts
Introduction to Warps/Shortcuts
Warps in Donkey Kong Country usually come in the form of a barrel that blasts the Kongs out of the level, and returns them considerably further through that level, generally right near the end. Here is a guide to the location of these warps, and instructions for accessing them.
Shortcuts are alternate paths and maneuvers which allow the Kongs to traverse level sections in a quicker fashion than the 'regular' path. Typically, shortcuts are achieved by blasting out of specific barrels, but there are other ways to shortcut through certain areas.
2-2: Mine Cart Carnage
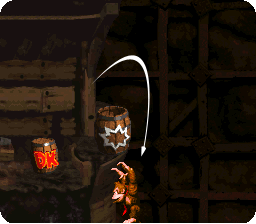
The first warp of the game requires a leap of faith. At the start, stand just to the left of the auto-fire barrel, and jump clean over it. As you fall, hold Left to guide yourself back against the mine wall... Below is another off-screen auto-fire barrel which will blast you into the warp barrel.
you may find it useful to break the DK barrel first to allow enough space for a run up.
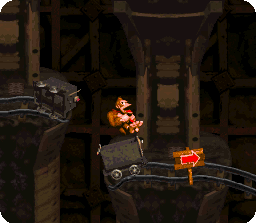
Upon returning to the level, an empty mine cart awaits. After a brief cart ride there's one Krash left to avoid, so it's up to your quick reflexes to get to the end of Mine Cart Carnage unscathed.
2-4: Stop & Go Station
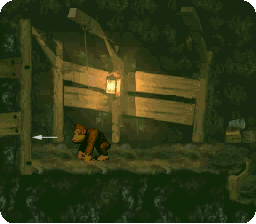
The trick to this warp is that it's just so simple, so you probably would never think to try this - Just walk back into the shaft entrance to your left... you don't even need to jump in a barrel! The trade-off of this super-easy to access warp is that you re-enter at the most RockKroc infested part of the whole level!
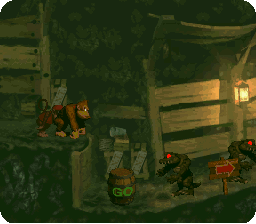
Interestingly, a DK Barrel is conveniently situated over the warp-return barrel, so you'll be sure to have both Kongs for the final stretch. Remember to make use of the 'Stop' barrels and the tires... and whatever you do, don't move too slowly... Quick footwork here is a must.
2-5: Millstone Mayhem
One of the trickiest warps, this one really takes precision. The warp barrel here will only appear for DK, so be sure to have the big guy handy.
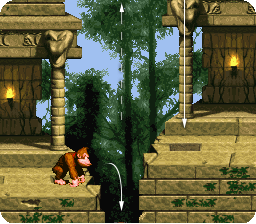
Take out the three Krushas and get past the millstone. The hole in the temple floor just past the millstone has an auto-fire barrel just barely visible at the bottom of the screen. Fall into that barrel and guide yourself Right as you are shot out, and land on the item stash to reveal a tire. Dispose of the jumping Kritter, then stand to the right of the tire.
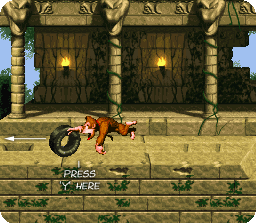
Here's where the precision comes in. Run at the tire, and press 'Y' to roll just as you touch it. If your timing was spot on, the tire will be knocked over the gap in the floor, and land on the other side. If not, bad luck! Try again next time! DK's barrel roll is a variable speed manuever, so the aim is to time the move so that DK's moving as fast as possible when he reaches the edge of the platform and pushes the tire off.
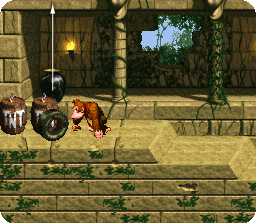
Once the tire is on the left platform, continue to push it left (avoiding the millstone again, of course!) towards the start of the level, until you get to the top of the steps where the the TNT barrels are/were, and position the tire just beneath the black urn in the temple background.
With all that done, just have DK jump on the tire and launch himself upwards to the warp barrel.
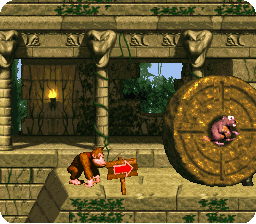
Upon returning, you'll have to bounce over a millstone and traverse a wide pit before reaching the level's end.
3-1: Vulture Culture
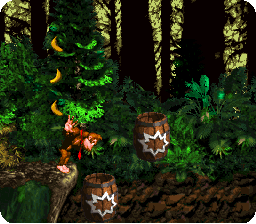
Another warp barrel that will only appear for DK, this one's all about speed. The goal is to get past the first perched Necky in less than 10 seconds. Remember, roll through baddies, blast out of barrels immediately, keep holding Right, and don't stop running! If you're quick enough, the warp barrel will appear at the bottom of the screen, just to the right of the platform and somewhat beneath the line of three vertical bananas.
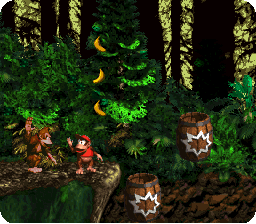
If you can't get there in time as DK, you can play as Diddy (he's quicker), then swap to DK after the perched Necky. The warp barrel will magically appear as soon as you swap to DK... provided you were quick enough to get there as Diddy, of course! If you swap back to Diddy, the barrel will vanish again.
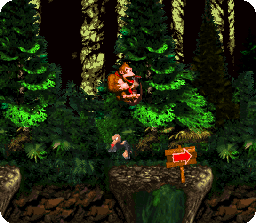
After taking the warp, you fall back in near the end, knocking a confused Mini-Necky unconscious, then it's just a matter of avoiding Zingers and one last Mini-Necky as you barrel blast your way to the end of the level.
3-2: Tree Top Town
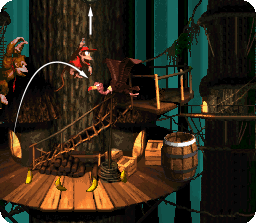
This one's trickier with DK than Diddy, but both Kongs are capable. The aim is to bounce from the Necky onto a barely visible tire, which can just be seen at the top of the screen, directly above the third banana on the platform. Straight up from this tire is the off-screen warp barrel.
It may help to bounce from the Gnawty onto the Necky, as that extra bounce gives more height.
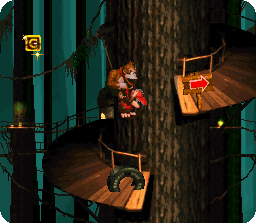
The warp-return barrel drops you onto a tire just a hop, skip and a jump away from the end.
4-2: Slip Slide Ride
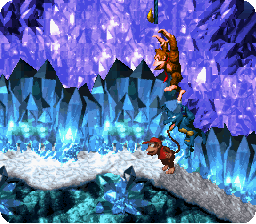
This is the only warp barrel that can always be readily seen, and despite this fact, only DK can reach it. It's also the only blue barrel in the whole game. Even though it's not entirely hidden off-screen, this blue warp barrel is well camouflaged in the ice.
Bounce on a blue Kritter's head to grab hold of the out-of-reach rope, let it slide you upwards, and jump onto the platform to the left.
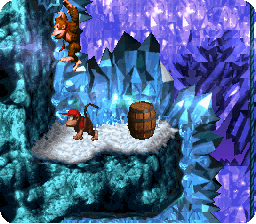
In the top left corner of the screen you should be able to just make out the lower part of a blue-tinted warp barrel. Jump as high as you can to reach it with DK. This highlights quite well that DK's jump reaches just that little higher than Diddy's, even though the little guy can land himself on higher platforms.
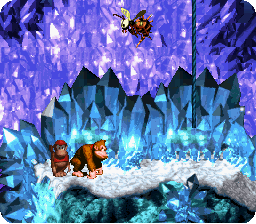
Although this warp saves a lot of time and effort, unlike the other warps, it returns you a fair distance before this level's arrow sign. There's still a bit of climbing to go, so pay attention to the colour of the ropes, and watch out for the Zingers lurking at the bottom of them, too.
5-2: Trick Track Trek
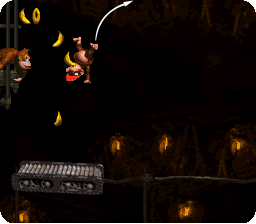
The biggest leap of faith since Mine Cart Carnage's warp, all that's needed here is a well executed super-jump (or roll-jump, as I've always called it). With either Kong (I'd use Diddy), just roll/cartwheel off of the scaffolding edge above the not-yet-moving platform and jump to the right before you lose too much altitude. A good jump will reach an off-screen warp barrel and you'll be taken within moments of the end of Trick Track Trek.
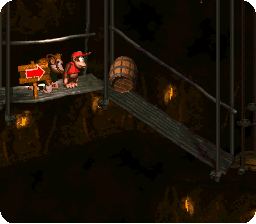
Although you're nearly home free, beware... there's a Manky up ahead, so be on the lookout for a few stray barrels coming your way. You can either jump over the Manky to reach the level's end, or roll/cartwheel attack him to find the hidden things that he's guarding...
Did I miss a warp?
If you know of a warp that isn't mentioned above, please let me know. Just post a message on the DKC Atlas Forum's Warps & Shortcuts thread.
1-2: Ropey Rampage
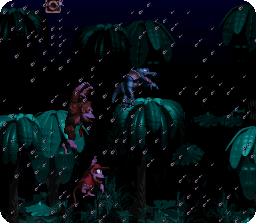
The first real shortcut of the game is accessed via Ropey Rampage's first bonus area. Just drop between the gap in the trees immediately after the Golden 'O' and you'll be blasted across (nearly 2 screenwidths - a small shortcut just in itself), to access the bonus. When in the bonus, the quickest way through is simply to run off of the ledge you start on - no need to climb the ropes. You exit the bonus area more than 5 screens further into the level, which is another little shortcut in its own right, but better yet, as you leave the bonus area (keep holding Right+Y for best results), you will be blasted another 5+ screens across, through the air.
This shortcut allows you to easily navigate that section at least 3 seconds faster than if you had skipped the bonus and taken the standard route.
1-5: Barrel Cannon Canyon
This level is full of shortcuts. There are barrel cannons all through this canyon, as the name implies, but three specific ones can be used to speed through this level practically without touching the ground. This is a much easier path, and it also lets you finish the level around 15 seconds quicker.
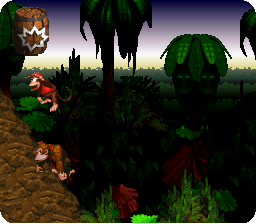
First of all, jump on top of the level entrance cave to access a blast barrel over to the left. This will blast you up to the first shortcut barrel. The combination of this blast, and the shortcut available from the series of barrel cannons it leads you to provides a quick route throught the first 11 screens.
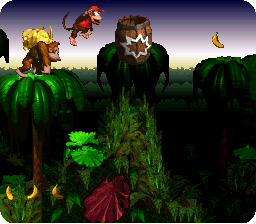
After the first shortcut, stick to the tree tops (or bounce back up using the line of three jumping Kritters) and you'll soon find the next big shortcut. This blast barrel (located just to the right of the Rambi token) will fire you across another 6+ screens, right up to the midway point.
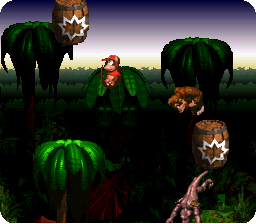
The final shortcut is a little trickier to find, but it fires you a whopping 15 screenwidths across, to the very end of the level! To take this awesome shortcut, jump over the first ravine you encounter after the midway point (immediately after the green Kritter), and you will see two brown Kritters, who jump on either side of a barrel cannon. The idea is to bounce on the head of the first brown Kritter during his jump, and land on the palm tree to the left. You can do this by either bouncing from the second Kritter onto the first one, or by firing out of the barrel cannon and landing on the first Kritter. Either way, aim to bounce off of the first Kritter at the peak of his jump, in order to give you enough bounce height to land on top of the palm tree. Once on the plam tree, jump into the blast barrel above, and you'll zoom above the rest of the level.
When shortcutting here, you only have to deviate slightly to reach the bonus areas. It's also interesting to note that these three shortcuts set you up perfectly to collect all of the KONG letters. Very convenient!
- Many more shortcuts will be added soon -


